Transparent-background cut-outs vs automatic removal
Why a ready-made cut-out beats automatic background removal, where the artefacts show up, and what to check along the edges before you use the file.
Use automatic background removal when the subject is opaque with a hard edge, and licence a ready-made cut-out when it is not. The reason is mathematical rather than a matter of software quality: at every partially transparent pixel along an edge, the image gives three measurements and the problem has seven unknowns, so any tool that separates a subject from its background is filling in the rest by assumption. Hair, fur, smoke, glass, lace, veils and motion blur are where those assumptions become visible. Whichever route you take, check the result at full size against both a white and a black background before you place it, because each one hides a different defect.
Why the edge is the hard part
Compositing assumes each pixel is a linear mix of a foreground and a background colour, written as I = αF + (1 − α)B. In A Closed-Form Solution to Natural Image Matting, Levin, Lischinski and Weiss point out that every quantity on the right-hand side is unknown, so for a three-channel colour image each pixel gives "three equations and seven unknowns" — three foreground channels, three background channels and the opacity value. The measurement at a single pixel cannot determine the answer, which is why the problem needs human input or a trained prior.
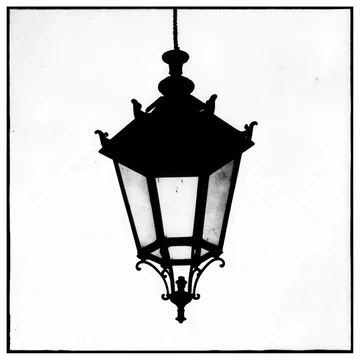
This explains the pattern every designer has already noticed without knowing the cause. A bottle, a box, a key, a metal lantern — anything opaque with a clean boundary — comes out fine from any modern removal tool, because the edge is only one or two pixels wide and the assumption barely matters. A fur collar, a wisp of smoke, a glass of liquid or a spinning wheel has hundreds of thousands of genuinely semi-transparent pixels, and there the tool is inventing, not measuring.
For a buyer this turns into a simple rule. If your subject is in the first group, removal is a two-second job and a cut-out saves you very little. If it is in the second, a file that was separated once, carefully, at the source is worth paying for, because you cannot recover that edge later.




Check it on black and on white
This is the whole quality-control procedure, and it takes a minute.
Place the cut-out over a pure white layer, then over a pure black layer, and look at the boundary at 100%. A dark halo shows up over white. A light fringe shows up over black. If the file was cut out against a white background and the edge pixels kept some of that white, you will see nothing wrong until the day someone drops it onto a dark hero banner.
The reason is how alpha is stored. The PNG specification uses unassociated alpha: "the color values in a pixel are not premultiplied by the alpha value assigned to the pixel", where zero is full transparency and the maximum sample value is full opacity. That is the right behaviour for an asset you will recolour or rescale, but it means the colour hiding underneath a half-transparent pixel still exists, and a sloppy cut-out leaves the old background there. Software that treats an unassociated file as premultiplied, or the reverse, produces the same fringing.
Two more things to look at while you are there. Check whether the edge has been over-sharpened into a hard stair-step, which is what happens when a tool thresholds the alpha instead of keeping soft values. And check for a thin outline of the original background colour in concave areas — between fingers, under a handle, inside a letterform.
Formats that throw the work away
An alpha channel in PNG carries 8-bit or 16-bit samples, which is what gives you a smooth gradient of opacity across an edge. Anything that reduces that to a yes-or-no decision destroys exactly the part you licensed.
JPEG has no alpha channel at all. Saving a cut-out as a JPEG does not warn you; it just composites the subject onto something, usually white or black, and the transparency is gone. Formats with single-bit transparency give you a hard-edged mask with visible jaggies on any curve.
The practical failures are usually workflow, not format choice. A cut-out exported to JPEG for a review round and then re-used from that file. A PNG resized in a tool that does not handle unassociated alpha correctly, leaving a halo where there was none. An asset pasted into a presentation that flattens everything on export. If the cut-out passes the black-and-white test when you receive it and fails it in the final layout, something in between flattened it.

Video cut-outs are a different purchase
Transparency in video is where most briefs go wrong, because the container matters more than the content.
Among Apple's codecs, ProRes 4444 and ProRes 4444 XQ "are the only Apple ProRes codecs that support alpha channels". ProRes 4444 carries "a mathematically lossless alpha channel up to 16 bits"; 4444 XQ supports up to 12 bits per image channel and up to 16 bits for the alpha channel. Apple notes that this is what makes them suitable for exchanging motion graphics.
So if a clip is described as having a transparent background and arrives as an H.264 or H.265 file, it does not have an alpha channel, whatever the description says. What you have is either a subject on black, which you will have to key yourself, or a file with a separate luma matte that your editor has to apply as a track matte. Both are workable; neither is what you thought you bought.
The other check is the one people forget on motion: a semi-transparent element such as smoke or a flame has to be judged over your actual background, in motion, not on the supplier's checkerboard. Edge artefacts that are invisible on a still frame flicker when the clip plays.
The shadow question
A cut-out has no shadow, and an object with no shadow floats. This is the most common reason a composite looks wrong even when the edge is perfect.
Decide which you need before you search. A clean cut-out with no shadow gives you full freedom and an obligation: you will add a contact shadow yourself, matched to the light in the destination layout. An asset with a soft shadow already baked into the alpha saves that work and locks you into one light direction, and in most cases the shadow cannot be separated out afterwards.
For product work on a light background, a cut-out plus your own soft contact shadow almost always beats a baked one, because the shadow has to agree with the rest of the page. For a quick social frame or a deck, baked is faster and good enough.

Checklist before you place the file
- View it at 100% over pure white and over pure black, and look specifically at the boundary.
- Look for a dark halo over white and a light fringe over black; both come from background colour left in semi-transparent pixels.
- Check concave areas and gaps, where a leftover outline of the original background is most likely.
- Check whether the alpha has soft values at all, or has been thresholded into a hard stair-step edge.
- For hair, fur, smoke, glass or motion blur, zoom in further; this is where an automatic cut-out will have invented the edge.
- Confirm the file is a PNG, TIFF or another format with a real alpha channel, not a JPEG with a white background you have mistaken for transparency.
- Decide whether you want a baked shadow or none, and check which you are getting.
- For video, confirm the codec supports alpha, and ask for ProRes 4444 or a separate matte if it does not.
- For a semi-transparent video element, review it in motion over your own background before approving it.
- Check the resolution against the largest size in the layout, since cut-outs get scaled more aggressively than full-frame images.
- Re-check the edge in the final export, not only in the working file, in case something along the way flattened the alpha.
What to do next
Sort your subject into one of two groups before you start looking. Opaque with a hard edge: remove the background yourself and spend the budget elsewhere. Hair, fur, smoke, glass, lace or motion: find a file that was cut out properly at the source, and test it on black and white the moment you download it.
You can browse my isolated on transparent collection for objects cut out against transparency, including semi-transparent subjects such as glass, flame and smoke where an automatic cut-out tends to fail.